KODAK EASYSHARE INSTRUCTIONS
I. CONNECTING A KODAK EASYSHARE DIGITAL CAMERA TO THE COMPUTER
1) Slide the door on the right side of the Digital Camera down slightly, and then flip open the door.
2) Insert the mini-USB connector into the hole under the slot where the SD memory card goes.
3) Connect the other end of the USB cable to one of the two front USB ports on the computer (tower) near the bottom of the front panel.
4) Double-click on the Kodak EasyShare icon on the desktop.
II. TRANSFERRING THE PICTURES FROM THE CAMERA TO THE COMPUTER
1) Turn the Digital Camera ON.
2) Wait for the Transfer window to pop up on the screen.
3) Click on the Transfer All button. Note how the pictures will automatically go into a folder whose name is the date, such as 2007-01-15.
Note: To find the pictures using the Windows Explorer instead of the Kodak EasyShare program, use the following procedure. (It is usually easier to view, delete, copy, backup and/or move the pictures to new folders using the Windows Explorer program.)
1) Double-click on the My Computer icon on the desktop. (This is the Windows Explorer program.)
2) Double-click on the Shared Documents folder.
3) Double-click on the Shared Pictures folder.
4) Double-click on the Kodak Pictures folder.
5) You should see the pictures on the right. The pictures will have file names like: 100_0008.jpg.
4) Wait a few moments for the pictures to be transferred to your computer.
Note: To prevent prematurely cutting off the transfer process, leave the USB cable connected until you’ve finished working with the pictures and closed the Kodak EasyShare program.
III. EDITING YOUR PICTURES
Note: Click once on the picture you want to edit first before doing the procedures below.
TO CROP A PICTURE:
1) Click on the Edit button at the top of the window.
2) Click on the Crop button at the far left at the top of window.
3) Click on ¤ Photo-size Crop if you want to constrain the Selection Rectangle to fit a 4 X 6, a 5 X 7, a 8 X 10, etc. piece of paper, or click on ¤ Free form crop if you want to be able to freely change the area that the Selection Rectangle covers.
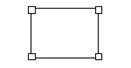
The Selection Rectangle:
4) Click & drag the “handles” at the corners of the Selection Rectangle in or out to change the area that you want to keep.
5) You can also click & drag the middle of the Selection Rectangle to move the Selection Rectangle around without changing its height or width.
6) When you are satisfied with the area contained by the Selection Rectangle, click on the Accept button. (This will eliminate the areas of the picture outside the Selection Rectangle.)
TO CHANGE THE BRIGHTNESS OF THE PICTURE:
1) Click on the Scene Balance button at the top center of the window.
2) Click & drag the slider under Exposure to change the brightness of the picture.
Slider: ![]()
3) Click & drag the slider under Shadow to change the brightness of the darkest areas in the picture.
4) Click & drag the slider under Highlight to change the brightness of the lightest areas in the picture.
5) When you are satisfied with the changes, click on the Accept button.
TO GET RID OF “RED-EYE”:
1) Click on the Red Eye button at the top of the window.
2) To zoom into the eyes, click & drag the slider under the Preview of the picture.
Slider:
![]()
3) To automatically get rid of red eye, click on the Auto Correct button.
4) If you are satisfied with the results, click on the Accept button. Otherwise, click on the Cancel button.
IV. PRINTING YOUR PICTURES
1) To select the pictures you want to print:
1) Click on the My Collections button at the upper left-hand corner of the window.
2) Click on My Albums.
3) Click on the album you want. (The albums will have the dates you transferred the pictures to the computer on them, such as 2007-01-15.)
4) Right-click on the picture you want to select (they will have file names like: 100_0008.jpg), then click on Add to Picture Tray.
Note: You can only print pictures that have been copied to the Picture Tray on the right.
5) To remove a picture from the Picture Tray, click once on the picture, then click on the Remove Picture button above (it has a picture of a “X” over a rectangle on it). To remove all of the pictures in the Picture Tray, click on the button to the far right (just to the right of the Remove Picture button).
2) Click on the Print at Home button at the left (the second button from the top).
3) Click on the Down Arrow next to whatever is in the Print Layout: box, then click on Index if you want to print out a “contact sheet” of multiple pictures (up to 72 pictures per page).
Remember: You must transfer a copy of all of the pictures you want to print to the Picture Tray first before you print them out.
4) Or, click on the Down Arrow next to whatever is in the Print Layout: box, then click on Full if you want a full-size printout, 2-up 4 X 6 in if you want to print two 4 X 6 inch pictures per page, 4-up 3.5 X 5 in if you want to print out four 3.5 X 5 inch per page, etc.
5) Put the Photo Paper in the paper tray of the printer with the shiny-side down.
Note: Be sure to remove the plain paper in the paper tray first before you put the Photo Paper in, if you aren’t printing your pictures on plain paper. The Photo Paper can stick to the plain paper and misfeed unless you remove the plain paper. Also, put only one sheet of Photo Paper in the paper tray at a time, if possible, because the Photo Paper sheets can stick to each other and misfeed.
6) Click on the Print button.
V. SAVING A PICTURE
1) Click on the Save As button.
2) Type a file name for this picture, or leave the file name the same. (Be sure to remember this name if you want to be able to find it later.)
3) Change the file format by clicking on the Down Arrow next to whatever is in the Save as type: box, then click on JPEG file (*.jpg, *.jpeg, *.jpe). [JPEG is the best, most universally-used format for picture files.]
4) To resize the picture, click on Full Size in the Resize picture: box, then click on one of the following:
75%
50%
25%
Best for Email
Best for Web
Thumbnail.
5) Change the Save in: location to the Desktop if you want to make it easier to find this picture, or leave the location set to the Kodak Pictures folder.
6) Click on Save.